Is there a special drill bit to use on the drums or will a standard wood bit work?
Sent from my iPhone using Tapatalk - now Free
Drill bit
Moderator: TBBQF Deputies
-
Raider18
- Cowboy
- Posts: 422
- Joined: Wed Jul 24, 2013 6:50 pm
- Location: Allen, TX
- Contact:
-
spacetrucker
- Chuck Wagon
- Posts: 3406
- Joined: Sun Jun 02, 2013 4:36 pm
- Location: Round Rock Texas
- Contact:
Re: Drill bit
use a bit made for steel, a wood bit will not hold up it will dull quickly and not cut at all...
for a few extra dollars you can buy a step bit at your favorite home improvement center
for a few extra dollars you can buy a step bit at your favorite home improvement center
Don't count every day, Make every day Count
Good Cue to ya..
Vernon
FEC-100
Webber kettle 22"
Webber genesis
Blackstone pizza oven
Good Cue to ya..
Vernon
FEC-100
Webber kettle 22"
Webber genesis
Blackstone pizza oven
-
Mr. Orange
- Wrangler
- Posts: 57
- Joined: Sat Feb 16, 2013 11:12 am
- Location: Round Rock, TX
- Contact:
Re: Drill bit
Use a bit for metal. Depending on the size of the hole to be drilled, you might look into a stepped-drill bit.
-
Grillatarian

- Rustler
- Posts: 243
- Joined: Mon Feb 25, 2008 8:28 am
- Location: North Central Texas
- Contact:
Re: Drill bit
I have used bi-metal hole saws that include a centering bit. They are cheaper than the step bits, but they don't hold up near as well. If you are just doing a single drum then a good bi-metal hole saw bit will do the job just fine. If you think you will be doing more than a single build then a step bit is worth the money. Since it is 'stepped' you can use it for a variety of the holes you may need or desire.
Since I got tired of wearing out the bi-metal hole saws and bought a step bit I have only used the step bit. I now have two and that is all I use during drum builds. They are safe and easy to use and make much cleaner holes.
Since I got tired of wearing out the bi-metal hole saws and bought a step bit I have only used the step bit. I now have two and that is all I use during drum builds. They are safe and easy to use and make much cleaner holes.
"I don't always smoke meat, but when I do...I use a drum. Stay hungry my friends!"
-
Grillatarian
- Rustler
- Posts: 243
- Joined: Mon Feb 25, 2008 8:28 am
- Location: North Central Texas
- Contact:
Re: Drill bit
As long as you use a bit rated for metal you will be fine. For a single hole, buying the proper sized bit may be your best choice. If you are making a large hole, 1/2" or larger, then I would still grab a step bit. Hard to beat for control and versatility. If you're going to use a coax or similar 1/4" sized ferrule assembly, then a single bit should work fine and would be easier on the wallet.
"I don't always smoke meat, but when I do...I use a drum. Stay hungry my friends!"
-
Boots

- Wordsmith
- Posts: 4584
- Joined: Sat Jul 23, 2011 12:16 pm
- Location: McKinney, Texas, USA!
- Contact:
Re: Drill bit
Use oil or some light running water to cool and lube the bit while drilling steel, it will cut better and last longer.
BE WELL, BUT NOT DONE
Hank: "Do you know how to jumpstart a man's heart with a downed power line?"
Bobby: "No."
Hank: "Well, there's really no wrong way to do it."
Hank: "Do you know how to jumpstart a man's heart with a downed power line?"
Bobby: "No."
Hank: "Well, there's really no wrong way to do it."
-
Big Ed

- Outlaw
- Posts: 2343
- Joined: Sat May 02, 2009 9:35 pm
- Location: Ft. Worth, Texas
- Contact:
Re: Drill bit
I use a uni-bit, a step drill. Works great and you can drill up to a 1'' hole.
Can't Beat A Drum!!!
Big Ed BBQ
https://www.facebook.com/BigEdBbq
Custom elf Pit (UDS on Steriods)
Water Tower pit
PK Grill
22'' weber kettle
Big Ed BBQ
https://www.facebook.com/BigEdBbq
Custom elf Pit (UDS on Steriods)
Water Tower pit
PK Grill
22'' weber kettle
-
SoEzzy

- Wrangler
- Posts: 83
- Joined: Fri Feb 23, 2007 10:56 am
- Location: SLC, UT
- Contact:
Re: Drill bit
Use a high speed steel (hss) drill bit, to create a pilot hole then use a step bit to get to the size that you want.
On a 55 Gallon drum, go to 1/2" on a step bit, on the lid, I drill 8 exhaust holes in my lids. You can go to 3/4" for the intakes and I like 6 of them.
When cooking on a UDS, close the intakes about 3 or 4 minutes before you take the lid off, work with the lid off for less than a minute, then put the lid on and wait 8 to 10 minutes before you reopen the intake... if you follow this, you will reduce the temperature spikes in your UDS and be able to maintain a much more even cooking temperature.
-
Raider18
- Cowboy
- Posts: 422
- Joined: Wed Jul 24, 2013 6:50 pm
- Location: Allen, TX
- Contact:
Re: Drill bit
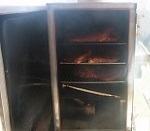
Used a regular drill, installed R&O more racks, one for meat and another for when I use a water pan
Sent from my iPhone using Tapatalk - now Free
Sent from my iPhone using Tapatalk - now Free
-
txluke

- Wrangler
- Posts: 68
- Joined: Wed Jan 27, 2010 10:14 pm
- Location: Victoria
- Contact:
Re: Drill bit
Technically you only need one drill bit to make a UDS. It is the size needed for the bolts to hold the grate. For the intake just drill a cluster of holes and use a refrigerator magnet to adjust. Use the bung for exhaust or go with clusters again. I built one this way and used the drill bit and drill as my only tools. I used wing nuts to hold the bolts in and bolts and wing nuts to hold my charcoal basket together. Why? Because someone told me he didn't have enough tools to build one. I showed him.
-
Vinnere

- Pilgrim
- Posts: 1
- Joined: Thu Nov 29, 2018 5:29 am
- Location: Toronto, CA
- Contact:
Re: Drill bit
I know it's an old thread, but maybe it will be a timely resurrection for someone.
I want tell how I did my bass drum last week for the double tom holder. First, measure 4 times, place a mark and measure again. Second, I put blue painters tape, double thick, on the drum and put my marks on that. Second Put the tape on the inside as well to prevent any tear out of wood ply. Drill small pilot holes first, then make sure your tape on the inside is in the proper place. If the holes only need standard drill bits like this https://mechanicguides.com/best-drill-bit-for-metal/, nothing like hole saws, then now you can now drill the proper size for the bolts. Once the holes are drilled remove the tape. The blue tape should leave no residue. Mine didn't. Make sure any gaskets are placed on the drums outside then put the pieces together. Hand tighten to make sure they are perfectly lined up, then tighten with a tool. Carefully. Any other ???? please PM me. Measure measure measure. Oh one more thing. Do not force the drill thru the wood and make sure the bit is sharp.
I want tell how I did my bass drum last week for the double tom holder. First, measure 4 times, place a mark and measure again. Second, I put blue painters tape, double thick, on the drum and put my marks on that. Second Put the tape on the inside as well to prevent any tear out of wood ply. Drill small pilot holes first, then make sure your tape on the inside is in the proper place. If the holes only need standard drill bits like this https://mechanicguides.com/best-drill-bit-for-metal/, nothing like hole saws, then now you can now drill the proper size for the bolts. Once the holes are drilled remove the tape. The blue tape should leave no residue. Mine didn't. Make sure any gaskets are placed on the drums outside then put the pieces together. Hand tighten to make sure they are perfectly lined up, then tighten with a tool. Carefully. Any other ???? please PM me. Measure measure measure. Oh one more thing. Do not force the drill thru the wood and make sure the bit is sharp.
-
OldUsedParts

- Deputy
- Posts: 20756
- Joined: Sun May 15, 2011 7:09 pm
- Location: Montgomery, Texas
- Contact:
Re: Drill bit
Vinnere wrote:I know it's an old thread, but maybe it will be a timely resurrection for someone.
I want tell how I did my bass drum last week for the double tom holder. First, measure 4 times, place a mark and measure again. Second, I put blue painters tape, double thick, on the drum and put my marks on that. Second Put the tape on the inside as well to prevent any tear out of wood ply. Drill small pilot holes first, then make sure your tape on the inside is in the proper place. If the holes only need standard drill bits like this https://mechanicguides.com/best-drill-bit-for-metal/, nothing like hole saws, then now you can now drill the proper size for the bolts. Once the holes are drilled remove the tape. The blue tape should leave no residue. Mine didn't. Make sure any gaskets are placed on the drums outside then put the pieces together. Hand tighten to make sure they are perfectly lined up, then tighten with a tool. Carefully. Any other ???? please PM me. Measure measure measure. Oh one more thing. Do not force the drill thru the wood and make sure the bit is sharp.
I approved this because it made me smile

Sir Vinnere, the Drum that is mentioned at the beginning is an UGLY DRUM SMOKER and it "does not" have a double Tom Tom Mount
Have a Nice Day
I am determined to sustain myself as long as possible & die like a soldier who never forgets what is due to his own honor & that of his country—Victory or Death. William Barret Travis - Lt. Col. comdt "The Alamo"
-
TwoGuysBBQ

- Outlaw
- Posts: 1257
- Joined: Fri Mar 30, 2012 9:01 am
- Location: San Antonio, TX
- Contact:
Return to “Ugly Drum Smokers (UDS)”
Who is online
Users browsing this forum: No registered users and 3 guests